|
Fixing Instructions
TOOLS
REQUIRED |
-
Fine tooth saw
-
Tape Measure
-
Pencil
-
Hammer or Stapler |
- Straight Edge
- Silicone Sealant
- Panel Pins &
Stapler or Adhesive |
|
Step One
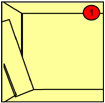
Check that walls are even. Otherwise, fix battens to wall. For
showers, backing should be wet area plasterboard or fibro cement
sheeting. The EDGING can be used to cap the top (and sometimes
bottom) of the panels. For full ceiling height, EDGING can be fixed
to the top of the wall before installing panels.
|

|
Step Two
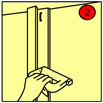
Cut EDGING to size with fine tooth saw. Fit in
vertical position at wall edge (if starting in corner, fit CORNER
PROFILE) and staple, pin or glue to wall.
|

|
Step Three
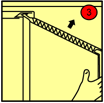
Cut Panelscape panels to length using fine tooth saw.
Fit first panel ROUNDED EDGE into EDGING or CORNER PROFILE. Apply
silicone adhesive to the back of the panel and glue to wall or
battens.
|

|
Step Four
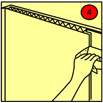
Panels can be also fixed to wall or battens by
stapling or nailing through the U shape panel edge instead of, or as
well as, applying adhesive to the back of the
panels.
|

|
Step Five
Repeat until the whole wall is covered. To install the
last panel, fit the EDGING or CORNER PROFILE and measure the
distance left. Deduct 6mm for the measurement and cut the panel to
fit.
NOTE: For shower or bath walls, panel joins and
bottom of panels should be thoroughly sealed with mould resistant
silicone sealant.
|

|